Monday 5 September 2016

Walk In Wardrobe Part 2...

Even before the stud wall was built, creating the space for the wardrobe, I was planning its interior.

So many options!

Fabulously girly?


Sleek and modern?


One of those hanging systems?


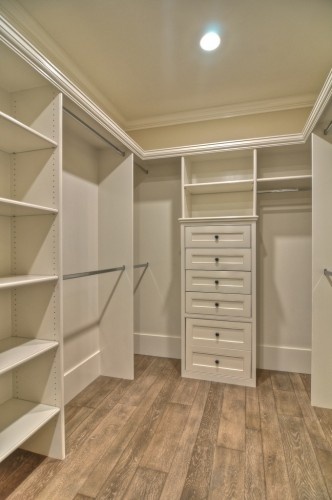
Er, some of these are clearly ROOMS rather than walk in wardrobes!

All very lovely. But the vibe I'm going for in this house is cottagey. It's not desperately old but the rooms are not generous, the ceilings are not high and the upstairs rooms have sloping walls as they're in the roof, so I can get away with it. The house was devoid of any character whatsoever when we moved in so it's been great to work with a blank canvas in many respects but you also have to work with what you've got.

We aren't going to get away with grand. I have no interest in modern. And too girly isn't fair on the husband. Plus I'm not really a girly girl.

I like old.


Character.


A bit of industrial...


But most of all, I want to get this look without spending a fortune and I want to do it all myself.

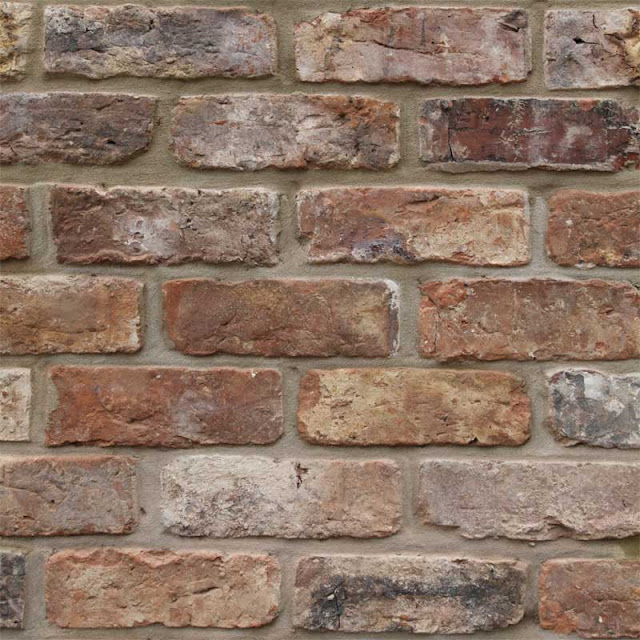
So let's start with the brick wall. I decided to create one feature wall. I knew I wanted something more substantial than wallpaper so I started investigating Brick Slips.

To get a beautiful brick slip, cut from real reclaimed bricks you are looking at anything from £40 per square metre plus carriage. And they're not light. Or easy to cut.

I found these...


On eBay from NGT DESIGN

No this is not a sponsored post.

The beauty of these brick slips is that they are half the price of real ones, are flexible and easily cut with scissors.


They come in seven different colours and I wondered if I could turn them from this...


into something more like this...

real bricks


So I had a little play with paint and went from this...


To this...


I'll explain how next time. 

But I'll give you a sneaky peak of how it all turned out!

my bricks


I'm in love with my faux brick wall. I can never, ever move house again. Sadly I now have to give away most of my clothes so that they don't obliterate the feature wall in the wardrobe. 
Back soon...


Saturday 13 August 2016

Walk In Wardrobe Part 1...

Things in the master bedroom haven't run as smoothly as I anticipated.

I started to build the stud wall to separate off the end section for the walk in wardrobe. The ceiling has always been bowed in that room but it felt solid enough. I mean, my father in law and I pushed on it and it didn't move so we thought it was fine. The last thing you want to do is take a ceiling down! Ugh, the mess and devastation!


So I started to frame out the wall which was quite tricky when it came to the top. I looked on the Internet to see how to build a stud wall round a bowed ceiling.
Nothing.
That should have been a clue that perhaps this isn't a good idea.


To accommodate the ceiling bow I had to shorten the sides of my stud timbers to get the top sitting level. Then pack out the side gaps.

Parcel tape is the carpenters friend if you are working alone and don't have enough hands!


We got the electrician in to remove the wall light you see above and put a central pendant light in the wardrobe space.


Ta daa! But here's where it all started to go horribly wrong. As I'd had to clear the loft space just above the new light fitting, I thought it would be a good time to board out the loft. We'd done a half arsed job when we moved in but the boards didn't reach the edges so I could gain more storage by doing it properly.

So there I was, toiling away in the loft when I noticed something bad. The loft boards were sliding between the central beam and the ceiling joists below. They are supposed to be tight up to each other. The ceiling was actually dangling in mid air. The boards I had laid looked great but there was a dip in the middle of the floor that you could feel as you walked on it.

We called in a local builder who came highly recommended by a friend. He pushed on the ceiling with one hand and it moved. My husband when up in the loft above and you could see the ceiling bouncing.

Not good.

We decided the best course of action would be to take the ceiling down, insert a new wooden beam, hoist up the joists as much as we could, strengthen them and put in a new ceiling.

This meant emptying the bedroom and the entire side of the loft above. You can imagine the chaos. There was stuff EVERYWHERE.


Not to mention dust and fibre glass...


Here you can see the new beam across the ceiling and the shiny new strapping to pull the joists up.


The new beam is far more substantial than the old one!


It was cemented into a hole in the brickwork at one end and the other end rests on a solid wall that runs down the depth of the house. The new and old beams were bolted together.

We can jump around in the loft now. That's important.

The ceiling went back up...


And then before we could plaster, we decided to replace the window which was an old aluminium frame and very badly fogged. If we replaced the window afterwards, it would bugger up the new plasterwork.


The ceiling works and plastering came to about £1000. The windows (we did the landing one too) came to £1000. This wasn't the worst part. Oh no. There was worse to come.

The builder said he could put up my stud wall in about half an hour. I REALLY wanted to do it. I mean, when am I ever going to get an opportunity to do another one? Never.
But there were things ALL OVER THE HOUSE and I was helping someone out with some childcare so I caved in. For the sake of progress, our sanity and family life I caved.

Rest assured, he put that wall up EXACTLY the way I was going to. But rather faster and without lots of painstaking research into how wide plasterboard is. The builder has all that information in his head as he does this full time.


We also battened out, insulated and recovered that lower end wall as it was very cold. I got the builder to leave the other side of the wall open so that I could reinforce the stud work where I'm going to need extra strength for hanging rails.

So. The room was built. Next was the fun part!

The prettifying! Back soon with that...

Thursday 30 June 2016

Armoire reveal... and why you should avoid oil based paints.

Gosh it's been a while! Is anyone still out there?
We've been through some rather tubulent, uncertain times since we last spoke. And that's just in the master bedroom, let alone our great nation.

I have sooo much to tell you. But first I must get this Armoire post out of the way. I finished it in February so I'm a little slow. I first wrote about it HERE.

I'll remind you how it looked when I found it, unloved and wearing some very bad paintwork.
Despite this, I fell madly in love.


Once I had accepted the fact that I couldn't keep it, (there was no way of getting it round the bend of the stairs) I decided to paint it in off white as white is the best selling colour for bedroom furniture.

I stripped and sanded, strengthened, de-wormed and replaced a missing trim and primed the bare wood. Luckily there was no bleed through so I got away with an ordinary primer.

I decided to use an 'oops' paint, a massive can of oil based eggshell I got for a fiver at my local paint merchants as the tint had gone wrong.

BIG MISTAKE! In the 16 to 24 hours it took to dry, it became a magnet for every airborne cat hair and dust particle I didn't even know I had. I married an OCD hooverer so I thought we were pretty clean. But no. It looked appalling.

I will never, not ever, use oil based paints again.

One good thing about the EU, love them or loathe them; they cleaned up our paints by taking out the toxic chemicals. This has caused problems with your average oil based white gloss yellowing in a matter of months, but the knock on effect has led to superior water based paints.
My kitchen is painted in water based paint. I can scrub it, knock it and it doesn't absorb grease.
My stairs are painted in water based paint. We walk on them. (Okay, they might be slightly trashed but, we have a LOT of furniture changes in this house which leads to more wear and tear than the average home. It would happen had I used oil based gloss too.)

Water based paints are the way forward. I'd certainly go for quality when you can. Ronseal for floor paint, F&B for cupboards, every time for me.

Anyway, lecture over.

A little more sanding, a new paint and hey presto...

It was finished.


All fresh and lovely. And very much stranded in the dining room.


I did some light distressing as this is good for furniture that will be in transit. A little ding here or there won't stand out.


I kept the original hardware as it was so deliciously French...


The wonderfully mottled mirror was taped off as I couldn't remove it...


A new rail replaced the old hooks and my work was done.


By the time it left us, I was actually glad to see it go, not heartbroken  as I'd expected to be. We'd been squeezing past it for over 6 months as it took over the kitchen or dining room. Sometimes love just dies and there's nothing you can do about it.
It was clearly meant for someone else.


Back next time with the master bed/walk in wardrobe work which led to this...


Yeah.
Not great is it?
It was at this stage that I received an email from a journalist wanting to photograph the house for a magazine. Instead of jumping for joy, it just made me very very sad.

One day....


Sunday 17 April 2016

The door headboard... for now.

The headboard is done. Sort of. Let's recap how it started...

Here's the door that cost nothing but our dignity as we dragged it half a mile.


It weighs a ton.

I sawed off one panel so that it would fit our double bed.


Then stripped the paint as it was all peeling off anyway. If it was sound I could have just painted over it.


I got some special brackets from ebay. ( Headboard Wall Mount Fixing Bolt Bracket Kit.)

One part slots inside the other. The outer section screws to the wall...


Extra holes drilled here as I put them in the wrong place. Damn measuring.

The inner part goes on the back of the headboard...


Then, if you've measured it all correctly you should be able to slide your two brackets into each other and your headboard is firmly mounted on the wall. Yesss! It worked. I did leave one of the brackets screwed on the door a little loose so I had a few mm of wiggle room if I needed it.

Using this wall mounting technique, you do get a little gap behind the headboard to accommodate the depth of the brackets.


I didn't want a little gap.
I designed a little pediment to sit on top of the headboard which would sit flush to the wall. I'd always planned on doing a fancy cornice to posh it up a bit but after extensive googling door headboards, I decided a very plain, MANLY pediment would work better.

Before pediment...


And after...


I wood glued and clamped the two strips to each other and stained them to match the original wood of the door. Then I screwed them on from the top, countersinking the screws so they could be filled and hidden.
There's still a little gap around the side of the headboard, but with the top flush to the wall, it doesn't matter.

I attached the pediment whilst the headboard was on the wall so that I didn't have to fanny around, working out my bracket depth and the amount of overhang needed. I just positioned it and drilled.

Next, it all had to come off the wall again for filling and another coat of stain. I was planning on painting and distressing but I wanted the wood that shows through the paint to be a uniform colour.

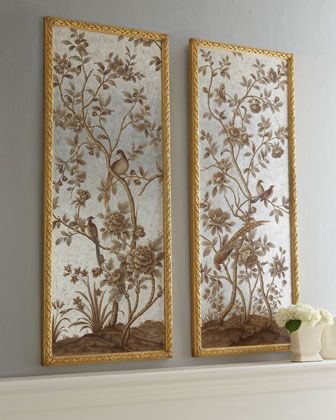
Painting was a source of disagreement. I wanted to do Chinoiserie in the panels!


Tasteful, elegant chinoiserie. Timeless and classical.

Jason was having none of it. He said he just wanted it painted one colour. All over. Flat.

My heart sank because I couldn't bring myself to do that. We discussed it. I badgered him until he said he really didn't care what I did.

Top tip; Start these conversations when your other half is watching football. Mine will agree to anything to make me shut up and go away. Headboards, it seems, are not as important as watching Liverpool.

But I compromised! That doesn't often happen.
I accept that he is a heterosexual male and doesn't want chinoiserie. Mostly because I still get to do some in my daughters room.

But I'm not bloody well painting flat solid paint.

I had a Dulux Trade paint sample made from a bit of the grey velvet they scanned in. The perfect paint colour for only a few quid. Before painting, I rubbed hard over all the edges with a candle so that the paint would distress easily in these areas.

And here's the result...

Sorry, I've not STYLED it properly with perfect pillows and uncreased bedding. Or the cellophane off the lamp...

Yes, it's very dark.


Certainly manly...


but perhaps slightly funereal?


Since ''finishing'' this headboard, I've had a NIGHTMARE finding curtains and curtain poles for this room and I've finally found some that are going to work.

But this headboard is now going to be repainted to match the curtains rather than the valance. And I will be much happier I think.

Jason couldn't care less. He's been so appalled and astonished by the anguish it has caused me choosing curtains and hanging devices, and the amount of time I've had to spend in curtain shops, (I'm not bloody making 90'' by 90''!) that he has thrown his hands up in despair over his entire bedroom and no longer wants to be consulted or informed.

Even if it involves Chinoiserie.


In other news, the armoire has now left the building and I didn't even get round to showing you that yet. Next time...